
by Svetlana Cheusheva , updated on November 7, 2023
This article showcases ten amazing features that you may not know about, but which may save you an enormous amount of time when dealing with routine emails.
If a major part of your online communication is repetitive emails, it would be only natural that you strive to optimize that part of your work. Replying with template can be a great alternative to composing emails from scratch in a tedious keystroke-by-keystroke way.
Outlook Email Templates: shared and easy-customizable Reply to routine emails with a click!
Context-sensitive and dynamic Add fillable text fields, drop-down menus, and date-picker calendars
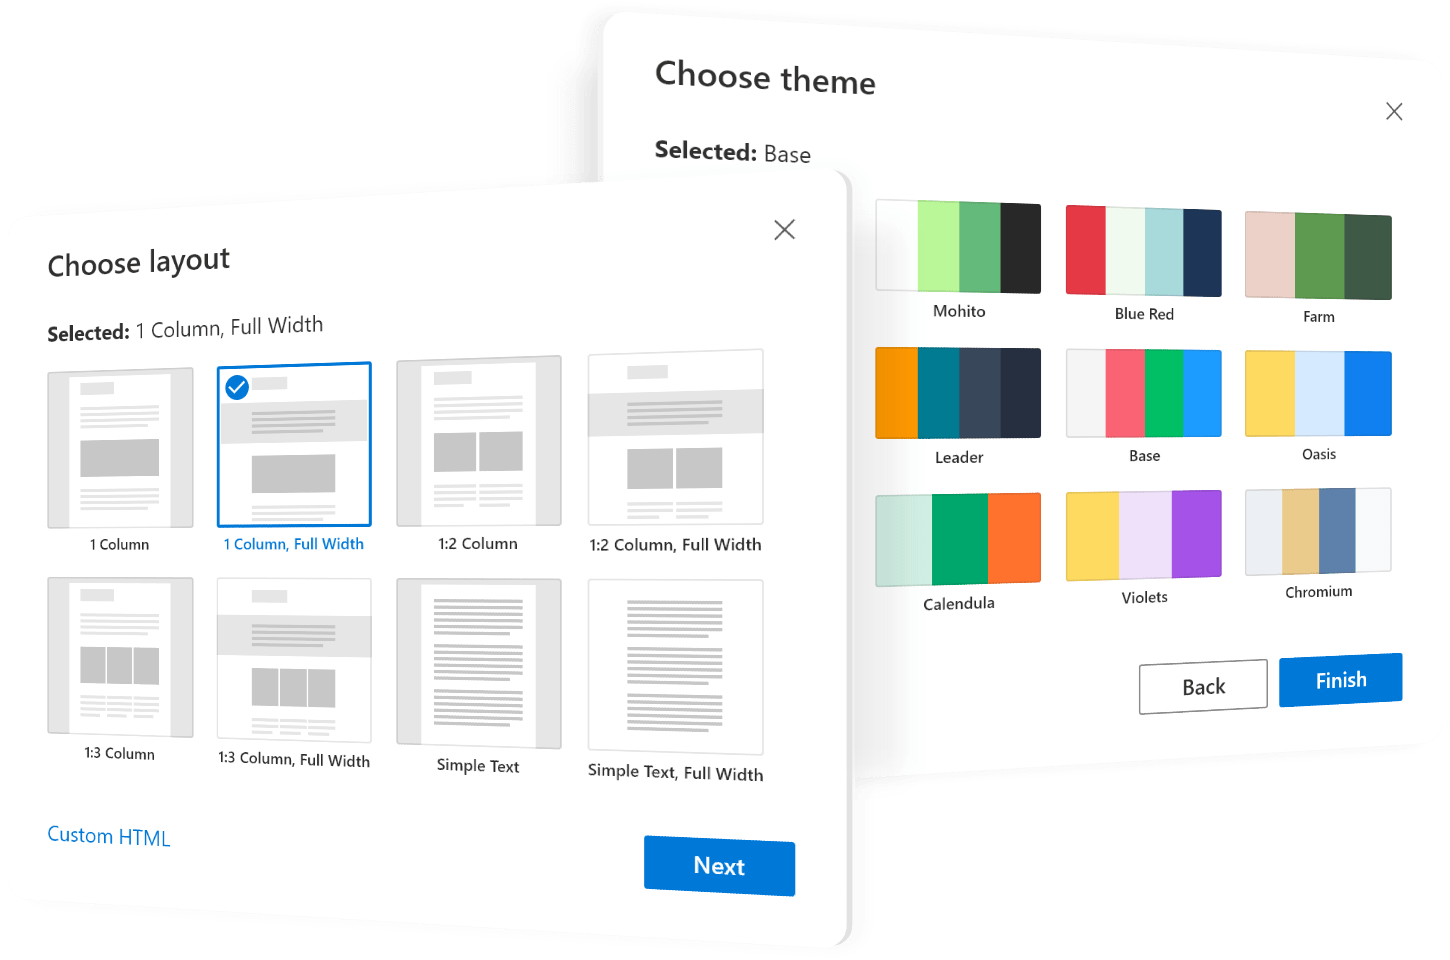
Perfectly suited for newsletters and eye-catching promos Ready-to-use adaptive HTML-based templates: 8 layouts and 14 color themes
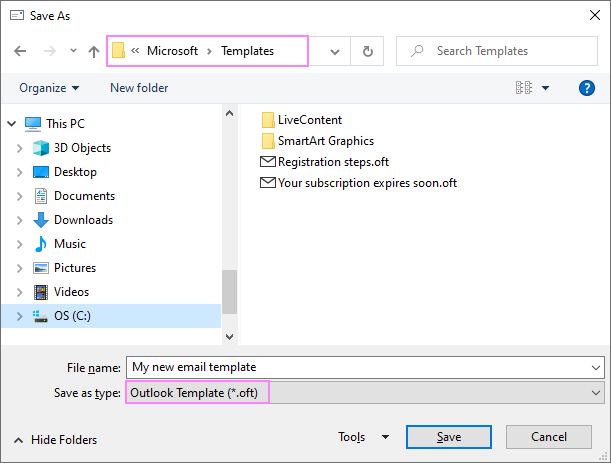
Email templates in Outlook are like document templates in Word or worksheet templates in Excel. If you often send the same or very similar messages to different people, you can save one of such messages as a template by clicking File >Save as >Outlook Template (*.oft). And then, instead of composing an email from scratch, you start with a template, customize it if needed, and hit Send. The message goes out, but the template remains, ready for the next use. By default, all Outlook templates are saved to the below folder. This should not be changed, otherwise you won't be able to open your template from within Outlook. C:\Users\UserName\AppData\Roaming\Microsoft\Templates
Advantages:
Drawbacks: bothersome to use - to open a template, you need to dig quite deep into the menus.
Supported versions: Outlook 365 - 2010 (desktop versions only)
The new Outlook in Windows, web app, and Outlook.com comes with an easier way to use email templates. Compared to .oft files in the classic desktop version, these do not require a ton of menu clicks to open. These new templates are simpler but not so extensive – they can contain small images and basic formatting, but it's not possible to preset email fields or attach files.
Like many other useful features, this one is hidden from immediate view. To make use of it, this is what you need to do:
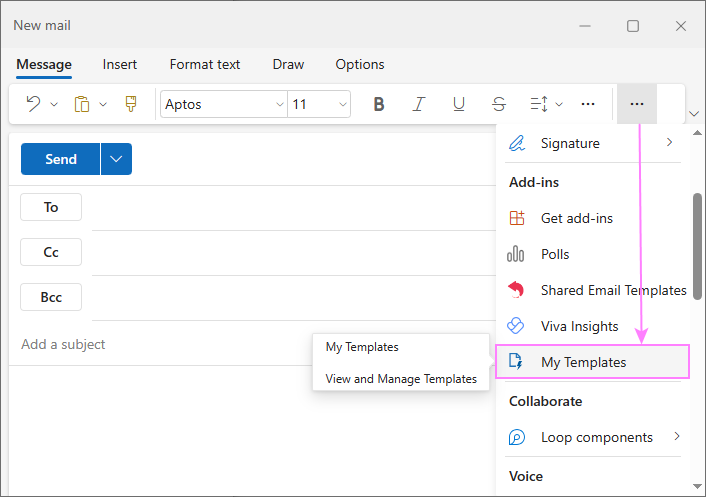
Getting to templates: When writing a new email, go to the Message tab. Click on the More options button (…) and pick My Templates under Add-ins.
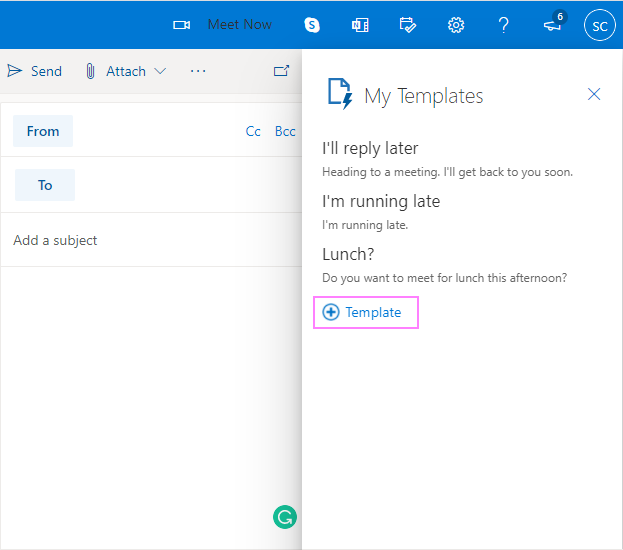
In Outlook on the web, click Apps on the Message tab, and then select My Templates.

Making your own templates: You'll see some default samples. To make your own, hit the + Template button. Type the title and message text in the corresponding boxes. Or just type and format in the email window, then copy/paste - it keeps the formatting.
Using templates: To insert a template in your email, just click its name in the panel.
In contrast to .oft templates, My Templates in the new Outlook appear tailored for short, text-only content, lacking some advanced features.
Note. If you can't find My Templates in your Outlook, follow these steps: go to the Home tab > Get add-ins. Under Admin-managed, ensure that My Templates has been added. If this doesn't help, reach out to your organization admin. They may need to activate this add-in on the backend.
Advantages: simple and intuitive
Drawbacks: limited options
Supported versions: New Outlook for Windows, Outlook web app, Outlook.com
Quick Parts are reusable snippets of content that can be quickly added to an email message, appointment, contact, meeting request, and task. Aside from text, they can also include graphics, tables, and custom formatting. While .oft templates are meant to constitute an entire message, quick parts are kind of smaller building blocks.
Quick Parts is the modern replacement of AutoText in Outlook 2003 and earlier. In recent versions, both types are available. The only difference between them is that the items reside in different galleries. In all other respects, Quick Parts and AutoText are essentially the same.
To create a new item, type your text in a message, select it and click Insert tab > Quick Parts > Save Selections to Quick Part Gallery.
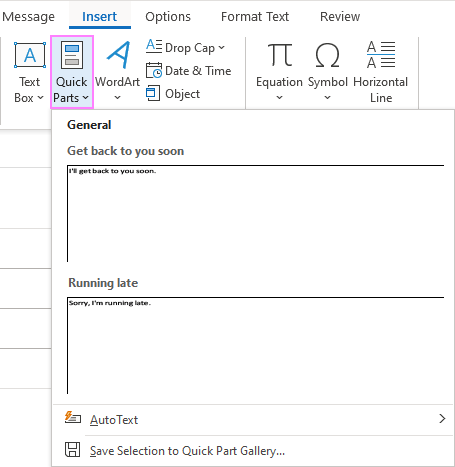
To put a quick part into an email, choose the needed one from the gallery.
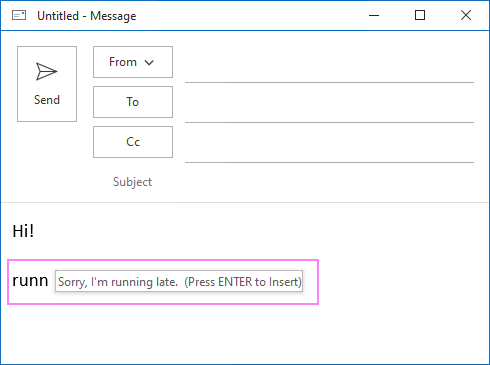
Or, you can type the quick part name in a message (not necessarily the whole name, just a unique part of it) and press F3 . In Outlook 2016 and later versions, when you start typing the name, a suggestion will pop up, and you can simply press the Enter key to inject the whole text.
Quick Parts are located in the in the NormalEmail.dotm file, which is stored here:
To back up your quick parts, copy this file to a save location. To export to another PC, paste it to the Templates folder on another computer.
Advantages: very simple and straightforward
Supported versions: Outlook 365 - 2007
Quick Steps are sort of shortcuts that allow performing multiple actions with a single command. One of such actions could be replying with template or creating a new email based on a template. Aside from the message text, you can prefill To, Cc, Bcc, and Subject, set a follow-up flag and importance.
To make a quick step template, click Create New within the Quick Steps box on the Home tab, and then choose one of the following actions: New Message, Reply, Reply All or Forward. In the Edit window, type the text of your template in the corresponding box, configure any other options that you think appropriate, and give your template some descriptive name. Optionally, assign one of the predefined shortcut keys.
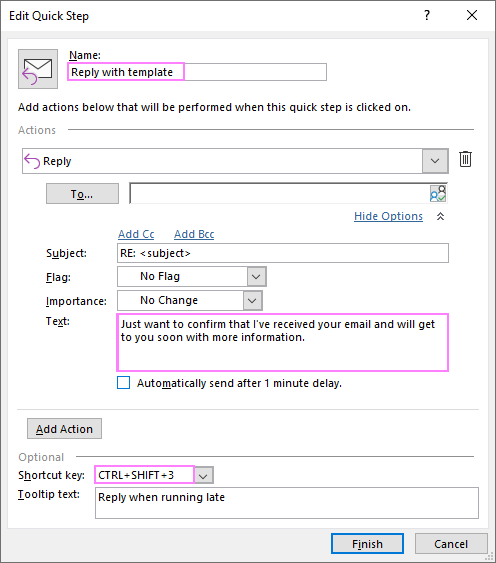
Here's an example of Outlook reply template:
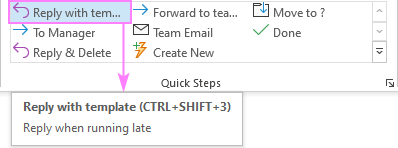
Once set, your new quick step will immediately show up in the gallery. Just click on it or press the assigned key combination, and all the actions will be executed at once.
Drawbacks: email template can only be plain text.
Supported versions: Outlook 365 - 2010
Drafts in Outlook are nothing else but unsent emails. Usually, these are unfinished messages that are saved automatically by Outlook or manually by yourself. But who says a finalized draft cannot be used as an email template?
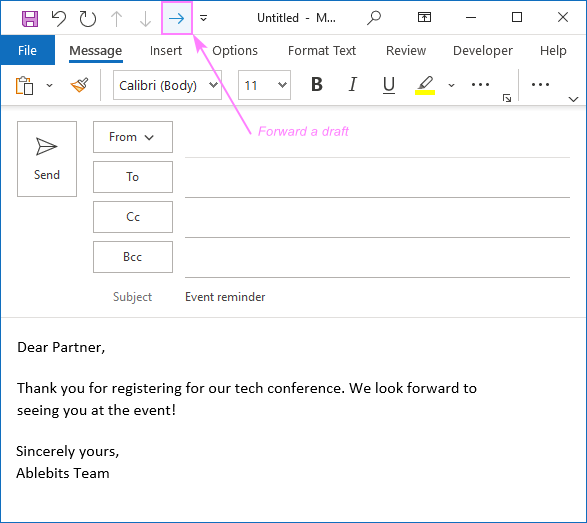
The beauty of this method is that you can create a re-usable draft email template exactly as you normally would - type the text in the message body, fill out the email fields, attach files, insert images, apply the desired formatting, etc. When your message is ready, do not send it. Instead, click the Save button or press Ctrl + S to save the message to the Drafts folder. If you have too many items in your Drafts folder, you could keep your templates in a separate subfolder(s) or assign categories to them.
The next time when you want to send a particular message to someone, go to your Drafts folder and open that message. The key thing is that you don't send out your draft, but forward it! When forwarding a draft, Outlook makes a copy of it keeping the original message for future use. Moreover, no header information is added above the draft's text, like it is normally done when forwarding an incoming email. The Subject line won't be prefixed with "FW:" either.
You may be wondering how to forward a draft in Outlook? Much easier than you may think :)
Advantages: very convenient to create, edit and organize.
Drawbacks: to keep your template, remember to forward a draft, not to send it.
Supported versions: Outlook 365 - 2000
Signature is a traditional element of written communication, and most Outlook users have a default signature added to their emails automatically. But there is nothing that would prevent you from having more than one signature and including information other than standard contact details.
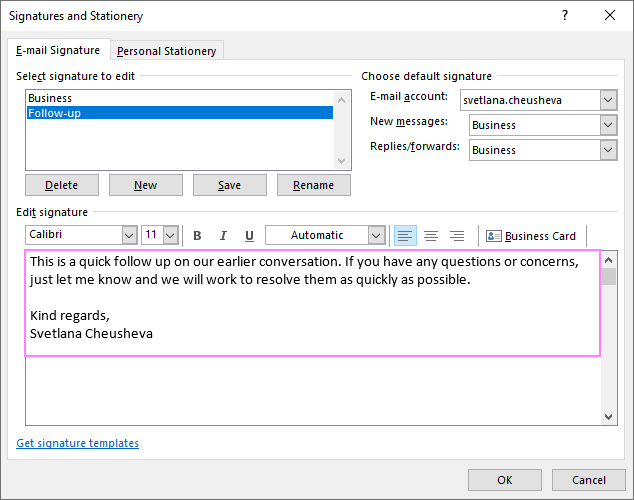
You can create a signature as an entire email template and insert it in a message with literally a couple of clicks (Message tab > Signature).
A word of caution! Apart from the message text, be sure to include your standard details in every signature you are creating. When you choose a different signature for a particular message, the default one is automatically removed.
Advantages: very quick and convenient to use
Drawbacks: you can only add information to the message body but cannot predefine email fields.
Supported versions: Outlook 365 - 2000
Though the AutoCorrect feature was not originally designed to be used as text templates, it does let you instantly insert certain text via an assigned keyword or code. You can think of it as a simplified version of AutoText or Quick Parts.
Here's how it works: you assign a keyword to some text, which can be as long as you like (reasonably of course) and formatted any way you choose. In a message, you type the keyword, hit the Enter key or space bar , and the keyword is instantly replaced with your text.
To open the AutoCorrect dialog window, head off to the File tab > Options > Mail > Spelling and AutoCorrect… button > Proofing > AutoCorrect Options… button.
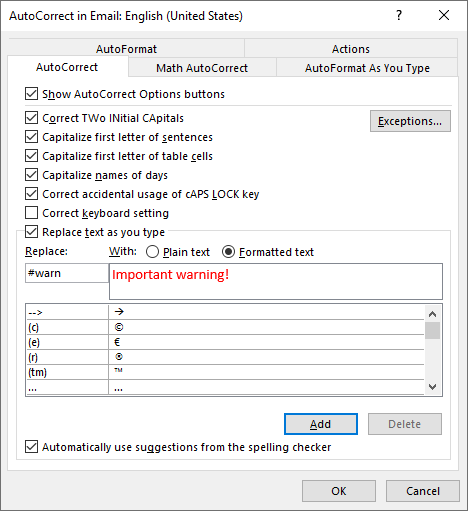
To configure a new entry, do the following:
Tip. If you want formatted text like in the screenshot below, then first type the replacement text in a message, select it, and then open the AutoCorrect dialog. Your template text will automatically be added to the With box. To preserve the formatting, make sure the Formatted text radio button is selected, and click Add.
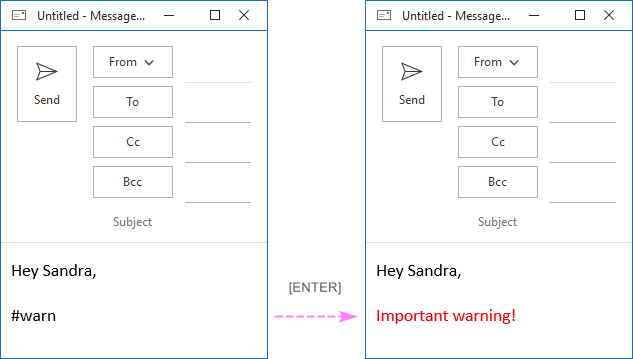
And now, type #warn in the message body, press Enter , and voilà:
Advantages: one-time setup
Drawbacks: the number of text templates is limited to the number of shortcuts you can remember.
Supported versions: Outlook 365 - 2010
The Stationery feature in Microsoft Outlook is used to create personalized HTML-formatted emails with your own backgrounds, fonts, colors, etc. Instead of or in addition to various design elements, you can also include text, and it will be automatically inserted in a message when you choose a stationery file.
You start with creating a new message, designing its layout, and typing the template text. It makes no sense to define Subject or any other email fields because when a stationery is used, this information will appear at the top of the message body.
When ready, save your message (File > Save as) as an HTML file to the Stationery folder here:
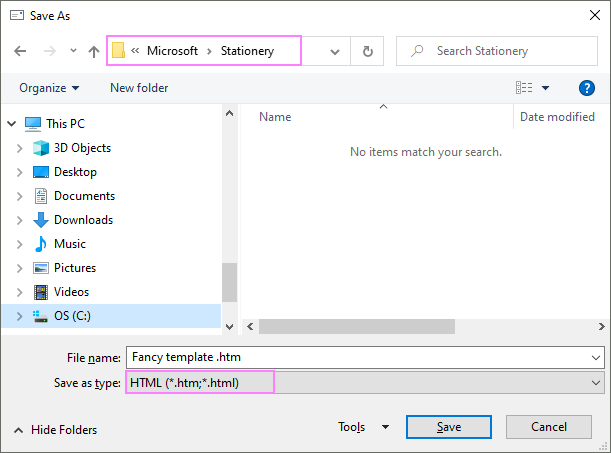
C:\Users\UserName\AppData\Roaming\Microsoft\Stationery\
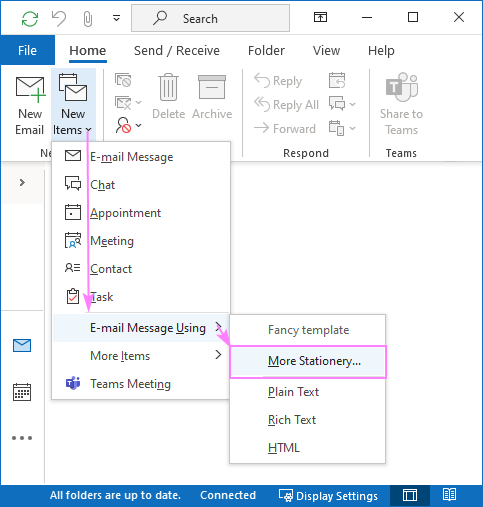
Once saved, you can select your stationery in the following way: Home tab > New Items > E-mail Message Using > More Stationery. The recently used stationery files will appear directly in the E-mail Message Using menu:
You can also choose a certain stationery as the default theme for all new messages you are creating.
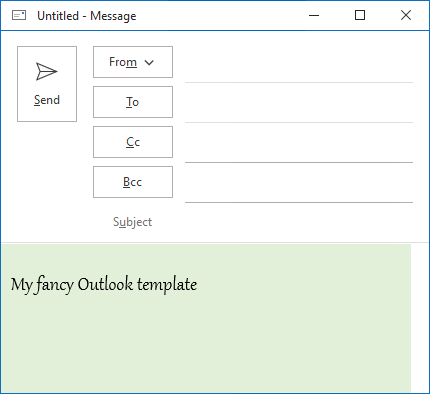
Here's an example of what your Outlook stationery message template may look like:
Advantages: a wealth of formatting options due to HTML support
Drawbacks: the number of clicks to save and access stationery files is a heck of a lot more than really needed
Supported versions: Outlook 365 - 2007
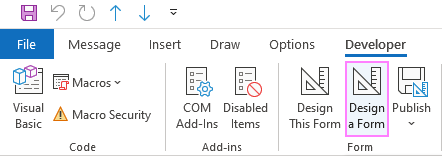
I will say it upfront - this technique is meant for professionals. Designing a custom form is a lot trickier than any other method discussed in this tutorial and may require VBA programming skills. To start with, enable the Developer tab in your Outlook. Then, click Design a Form, pick one of the standard forms as a base for your custom form, add fields, controls, and possibly code, set attributes and publish your form. Sounds perplexing and obscure? Indeed, it will take time to figure out that thing.
Advantages: a very powerful feature with plenty of options
Drawbacks: a steep learning curve
Supported versions: Outlook 365 - 2007
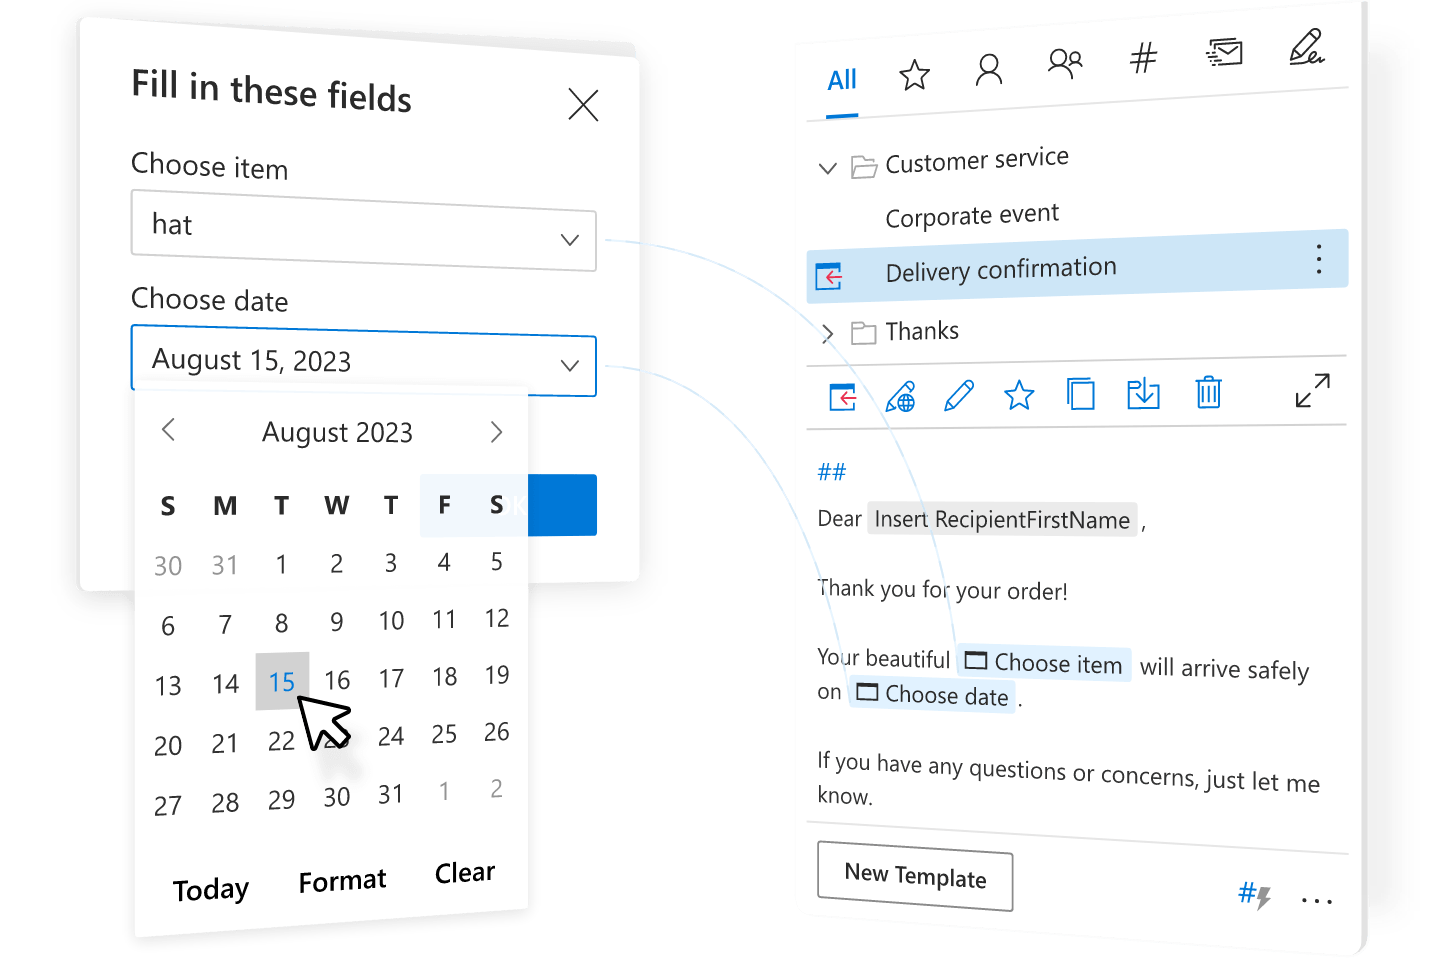
Believe it or not, this solution is a joy to use for novices and gurus alike. Beginners will appreciate the simplicity - getting started with Shared Email Templates is intuitive enough to jump into it right away. Outlook experts can leverage many advanced features such as creating personalized responses with the help of macros, configuring predefined, fillable and dropdown fields, pulling information from datasets, and a lot more.
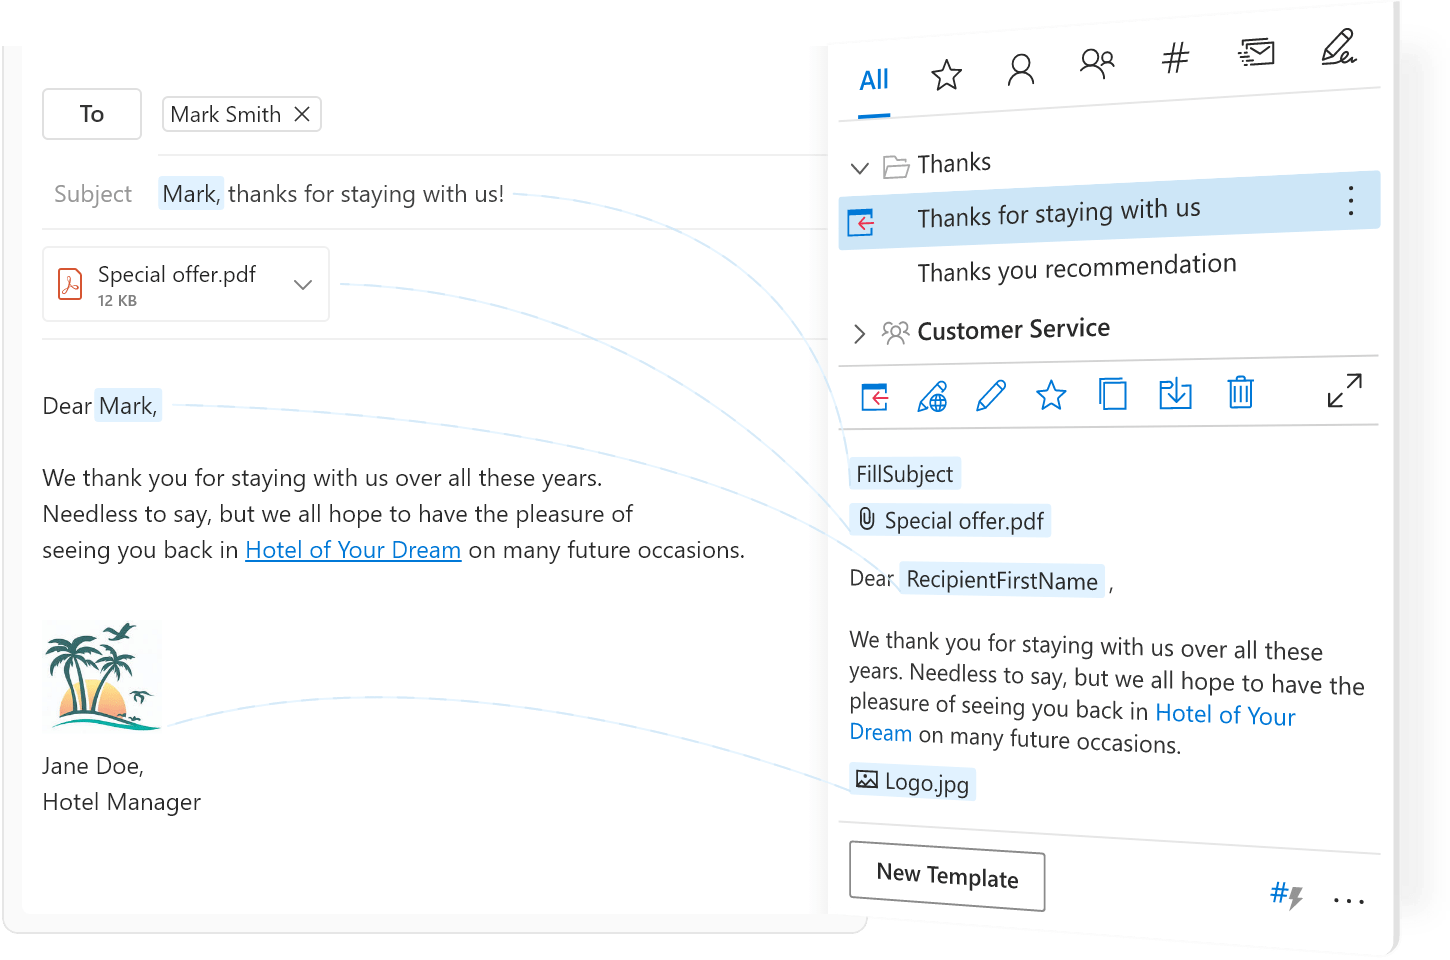
Contrasting from the inbuilt features, Shared Email Templates brings all the functionality directly into the message window! You can now create, edit and use your templates at a moment's notice, without switching back and forth between different tabs and digging into the menus.
To create a new template, simply select the desired content (text, images, links, etc.) in a message and click New Template.
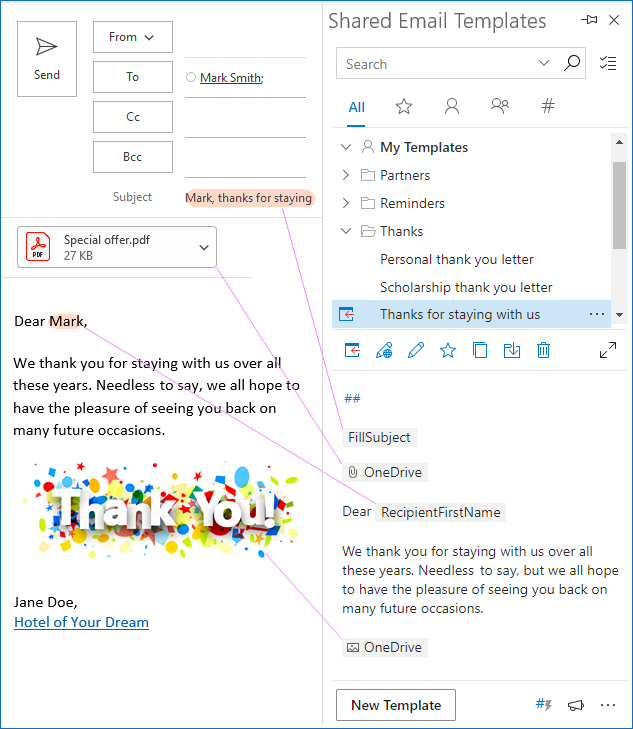
To insert a template into a message, click the Paste icon or double-click the template name.
Drawbacks: you are welcome to test and let us know :)
Supported versions: Outlook for Microsoft 365, Outlook 2021 - 2016 Windows and Mac, new Outlook for Windows, Outlook on the web
How to get: Choose your subscription plan or download a free version from Microsoft AppSource.
That's how to create an email template in Outlook. Hopefully, our tutorial will help you choose your favorite technique. I thank you for reading and hope to see you on our blog next week!